You may have recently bought some coir matting and are wondering how you should fit it, or you may have noticed that the coir mat you currently have is looking a little bit worse for wear and it is now time to invest in a new one. Either way, you will be pleased to learn that the process of fitting coir matting is simple, and your matting can easily be cut down to any size if you follow the steps outlined below.
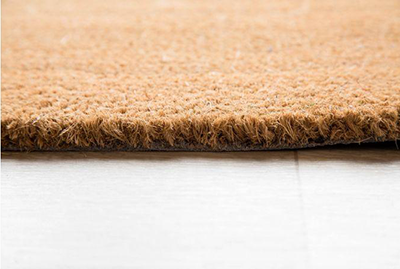
The coir matting we offer at Commercial Matting is durable and hardwearing and is made from natural coconut fibres to remove dirt and moisture effectively, and can be used in many indoor settings such as in your home, shops, and public buildings, all of which require different measurements and fittings. Whatever size you need, coir matting can easily be cut down to fit perfectly in the space available.
Here is a quick guide on how you can cut your coir matting like a professional.
Useful tools
- Tape Measure
- Stanley Knife/Sharp Knife
- Marker Pen
- Steel Ruler or something sturdy for you to cut along
- Notepad and pen
For the most part, these are the only tools you will need, now find below the steps on how to cut your matting.
4 Simple Steps
- Measuring the space for your coir matting is vital and your measurements must be as accurate as possible to allow for a perfect fit. Not all wells and recesses are as straight and symmetrical as you think so double check your recordings. Make sure to measure the length, width, and depth of the space, noting down the measurements on a notepad so you don’t forget!
- Lay your new piece of coir matting upside down, so that the PVC backing is facing you. Using a marker pen transfer your gathered measurements onto your matting, making visible marks at multiple points to ensure your matting will be cut correctly. You can add a 5cm allowance to your measurements, so your matting doesn’t end up too small. You can use your tape measure or steel ruler to join these marks up, to make sure they’re straight.
(As we advise, PVC-backed commercial coir matting should be avoided in an outdoor setting so make sure you’re using it for indoor use such as in entrance mat wells, etc.)
- Now it is time to start cutting! Line up your steel ruler with your measurements and using your Stanley knife cut the PVC backing against the ruler. As long as you clearly cut through the PVC backing, the coir matting can be carefully pulled apart.
- Turn over your coir matting and fit it into place, firmly pressing all the edges down so it is secure. Do not worry if it doesn’t fit as precisely as you would like, the edges can always be trimmed where necessary from where you left your 5cm excess. Your commercial coir matting should stay in place with no added adhesive.
If you don’t want to take the risk of cutting your own matting then don’t worry, at Commercial Matting, tailor-made matting is something we specialise in. Our made-to-measure service allows you to receive your coir matting already in the exact size required, leaving all the cutting to us, and leaving you with no hassle, which equals a happy customer!
We have our coir mats available in 7 colours, in a range of thicknesses and of course in different sizes.
You can contact us today to discuss any requirements you may have, or you can also order through our website, entering your desired width and length dimensions in centimeters. Please do make sure these are correct to ensure a flawless fitting coir mat. We hope that this blog post has given you the confidence to cut your own coir matting or to know how to do it for future reference. However, if you still would rather have someone else do the cutting, and you’d like to take advantage of our made-to-measure service we are always here to help!